
How to Install EIFS Mesh for a Strong Basecoat
A basecoat can look smooth at the end of the day and still fail later if the reinforcement was rushed. Knowing how to install EIFS mesh correctly means treating the mesh as part of the wall assembly, not as a layer to bury quickly before finish coat. Proper overlap, full embedment, and extra reinforcement at stress points are what help the system handle normal movement and resist cracking.
For contractors working on exterior walls in New York and the tristate area, the details matter even more. Wind-driven rain, freeze-thaw exposure, busy jobsite schedules, and mixed substrates leave little room for improvised system work. Start with compatible materials and follow the EIFS manufacturer's written specifications for the particular system on the wall.
What EIFS Mesh Does in the Basecoat
EIFS mesh is alkali-resistant fiberglass reinforcement designed to sit within the basecoat. It gives the basecoat tensile strength and helps distribute stress across the wall surface. Without it, the basecoat is far more vulnerable to impact damage and cracks around corners, windows, doors, and transitions.
Standard mesh is commonly used across broad wall areas. Higher-impact mesh may be specified at first-floor elevations, entrances, loading areas, school walls, or any location likely to take abuse from carts, pedestrians, equipment, or landscaping work. Heavy-duty mesh is not a substitute for standard mesh unless the system manufacturer permits that approach. In many assemblies, impact mesh goes on first, followed by the standard reinforcing mesh.
The goal is simple: the mesh should be fully embedded in the wet basecoat, close to the surface but not exposed. If the weave is visible after the basecoat cures, it was not fully covered. If the mesh is pushed all the way against the insulation board, it may not reinforce the outer portion of the basecoat where it does the most work.
Before You Install EIFS Mesh
Do not start rolling mesh onto a wall until the insulation-board surface is ready. Boards should be firmly attached, properly aligned, and rasped or sanded as required to remove high spots and create a flat, continuous plane. Gaps, damaged board edges, and loose fasteners need attention before basecoat work begins.
Check the project documents for the approved basecoat, mesh weight, impact requirements, trim details, and fastening schedule. EIFS components are tested as systems. Mixing a basecoat from one system with mesh, adhesive, or finish components from another can create warranty and performance problems, even if the materials appear similar.
Weather also affects the work. Basecoat should not be applied to wet, frozen, overheated, or contaminated surfaces. Follow the product requirements for ambient temperature, wall temperature, rain exposure, drying time, and protective covering. On a hot sunny elevation, direct sun can pull moisture from the basecoat faster than expected. On a damp day, curing can take longer and the crew may need to adjust its schedule.
Have the right materials staged before mixing. At minimum, crews need approved basecoat, the specified fiberglass mesh, a clean mixing pail, a low-speed drill and paddle, stainless steel trowels, a knife for cutting mesh, and corner or casing beads where the detail calls for them. Precutting mesh for the wall sections and openings keeps the crew from stopping halfway through a wet field.
Reinforce Openings and Stress Areas First
Windows and doors are common crack locations because the corners concentrate stress. Before applying the field mesh, install diagonal mesh patches at each corner of an opening. These are often called butterfly patches. The exact patch size and orientation should match the EIFS system details, but the purpose is always the same: reinforce the corner before the larger field sheet crosses it.
Also install specified corner mesh, backwrap mesh, starter-track reinforcement, and accessories before the main wall field is covered. Outside corners, inside corners, parapets, transitions to other claddings, and penetrations all need the right detail. Do not assume a heavy field layer will solve a missing transition detail.
How to Install EIFS Mesh Step by Step
Mix the basecoat to the manufacturer's instructions. Avoid adding extra water to stretch the material or make it feel easier to trowel. An over-watered mix can affect working time, bond, and cured strength. Mix only what the crew can apply within the product's working time.
Apply a uniform layer of wet basecoat over a manageable section of wall. The area should be narrow enough that the basecoat stays workable while you embed the mesh. On a large open elevation, that may mean working in vertical strips. On cut-up residential work, it may mean one wall section at a time.
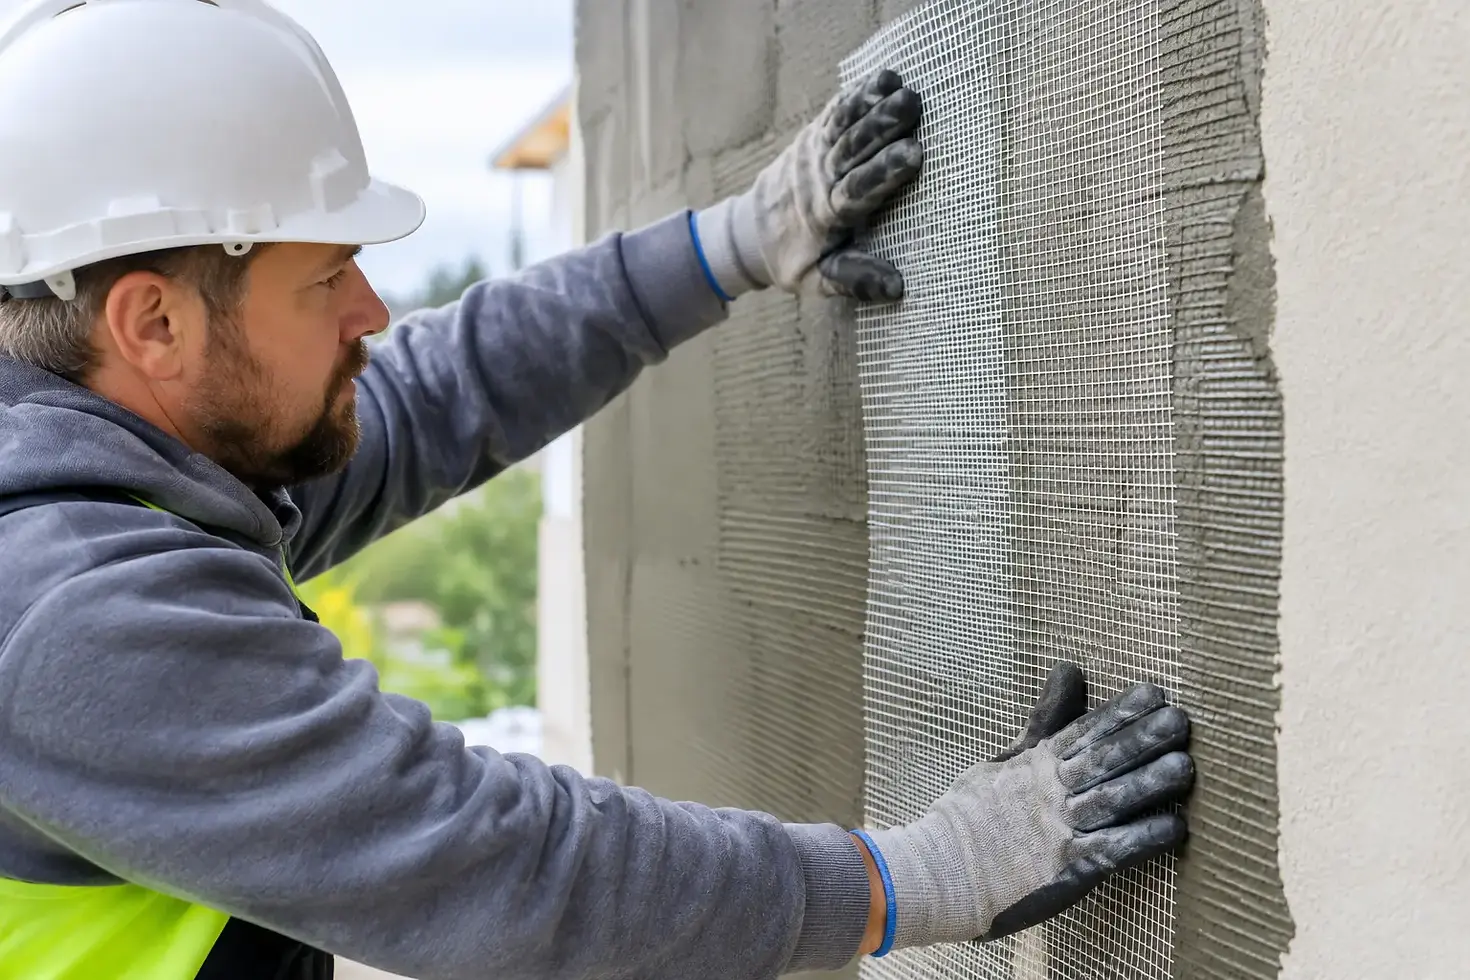
Press the mesh into the wet basecoat with a stainless steel trowel, working from the center outward. This pushes out air pockets and wrinkles while keeping the mesh flat. Do not pull the mesh tight enough to distort the weave. The mesh should lie flat without bubbles, folds, or tenting over board joints.
Run sheets continuously where possible and overlap adjacent pieces according to the system specification. A common requirement is a minimum 2 1/2-inch overlap, but the approved system detail controls. Short overlaps create weak lines in the basecoat, especially where wall movement or impact is expected.
Once the mesh is embedded, trowel additional basecoat as needed to cover it completely. The finished layer should look uniform, with no visible mesh pattern, raised edges, wrinkles, or dry spots. Keep the mesh in the outer third of the basecoat thickness rather than tight to the foam. That placement gives the reinforcement better crack-control value.
At corners and edges, maintain continuity. Wrap mesh around outside corners when the system detail requires it, and provide the required lap onto adjacent surfaces. Where a termination or trim interrupts the wall, use the specified accessory and backwrapping method. Cutting mesh flush at an exposed edge without proper termination can leave the assembly vulnerable to separation and moisture intrusion.
Check Your Work While the Basecoat Is Wet
The easiest time to fix mesh problems is before the basecoat begins to set. Walk the wall and look across the surface from an angle. You can usually spot raised laps, loose mesh, exposed weave, and trowel ridges before they become a hardened repair.
Pay close attention to window corners, board joints, scaffold tie-in areas, and transition details. If a section of mesh is wrinkled or has poor embedment, pull it back while the basecoat is still wet, apply fresh material if needed, and reset it. Trying to skim over a bad wrinkle rarely produces a dependable repair.
Common EIFS Mesh Installation Mistakes
The most common mistake is installing mesh over basecoat that has already started to skin over. The mesh may appear attached, but it will not be properly embedded. Apply basecoat in smaller sections when heat, wind, or crew pace makes the material set too quickly.
Another problem is butt-jointing mesh instead of overlapping it. Every sheet-to-sheet joint needs the specified lap. Do not place mesh seams directly over insulation-board joints when layout allows you to avoid it. Staggering seams helps prevent a continuous weak line through the wall assembly.
Crews also run into trouble by skipping diagonal reinforcement at openings, using the wrong mesh weight in impact zones, or leaving mesh exposed. Exposed fiberglass can wick moisture, weaken the surface, and telegraph through the finish. If the mesh is visible after curing, apply an approved corrective basecoat layer before moving to primer or finish.
Finally, do not rush the cure. Basecoat needs the required dry time before the next system layer goes on. Humidity, temperature, and wall exposure all affect timing. A wall that feels dry at the surface may still need more time before primer or finish application.
Plan the Material Package Before the Crew Starts
EIFS work runs better when mesh, basecoat, trims, fasteners, and finish materials arrive as one coordinated package. That helps avoid a mid-wall substitution or a stop in production because a crew is short on corner mesh or a compatible accessory. For repairs, bring a piece of the existing system information or clear photos of the wall detail when possible. Matching the correct material is more useful than guessing from color alone.
Prime Stucco Supply can help contractors and property owners sort out the practical side of an EIFS material package, including standard or high-impact mesh, basecoat, trims, and jobsite delivery needs. For homeowners, a qualified installer is usually the better choice for anything beyond a very small, well-understood repair.
A clean EIFS finish starts long before the finish coat goes on. Give the mesh the time and attention it needs, and the wall has a much better chance of staying flat, reinforced, and ready for the next phase of the system.


Comments